

在用whmcs + Proxmox VE VPS For WHMCS插件,一直没找到什么向用户展示NAT端口信息的好的方法,目前大部分人在用的都是源自论坛Twilight佬的单独页面端口计算的方法,不是很方便,需要用户自行计算;同时到看有分享经验的小伙伴提到利用添加hook文件的方式在whmcs前端页面显示当前账户余额功能的代码,于是让ai简单的尝试写了一下,发现可行,于是分享出来。
具体效果:
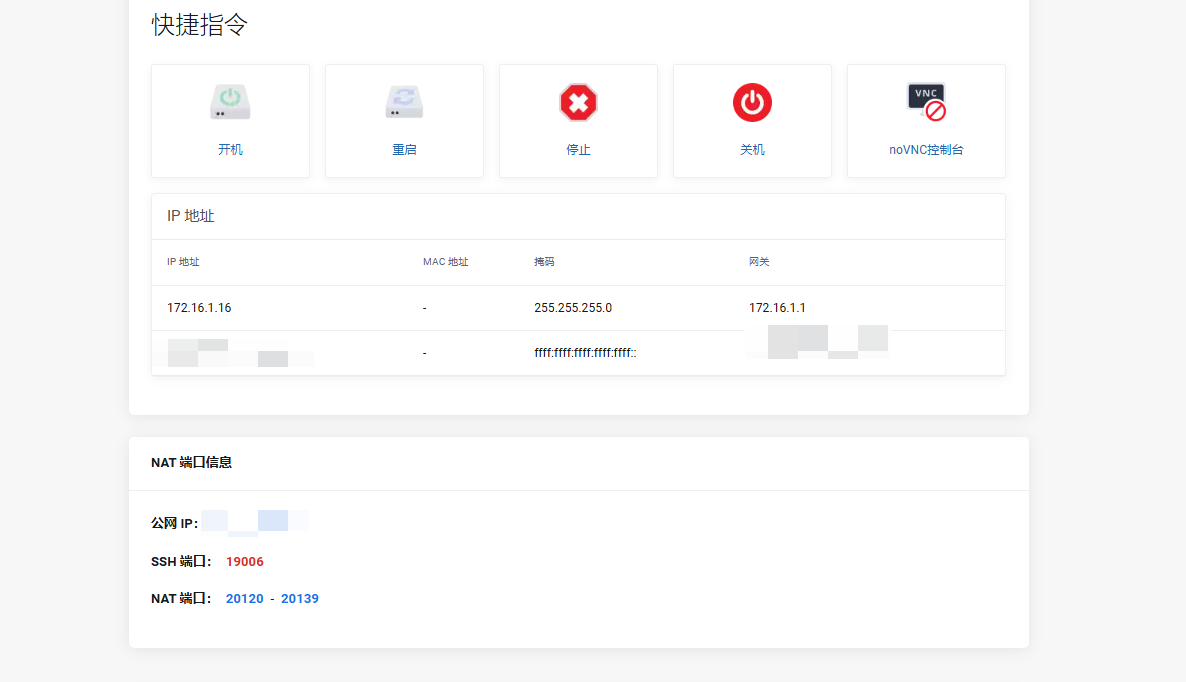
如何实现:
将下面的代码保存在/includes/hooks/portmap.php即可。
这里查找页面私网IP网段为172.16.x.x的格式,ssh的端口范围从19000开始计算,NAT分配端口从20000开始每隔20为一组,可以根具自己的需求更改,iptable的端口转发大家应该都很熟练,这里不涉及配置方法。
<?php
use WHMCS\Database\Capsule;

if (!defined("WHMCS")) {
    die("This file cannot be accessed directly");
}

add_hook('ClientAreaProductDetailsOutput', 1, function($vars) {

    // 限定仅主产品详情页
    if (
        (isset($_GET['modop']) && $_GET['modop'] !== '') ||
        (isset($_GET['a']) && $_GET['a'] !== '') ||
        (isset($_GET['mg-page']) && $_GET['mg-page'] !== '') ||
        (isset($_GET['action']) && $_GET['action'] !== 'productdetails')
    ) {
        return '';
    }

    $service = $vars['service'] ?? [];

    // 找所有可能的 IP
    $candidates = [];

    if (!empty($service['dedicatedip'])) $candidates[] = $service['dedicatedip'];

    if (!empty($service['assignedips'])) {
        foreach (preg_split('/[\r\n,;]+/', $service['assignedips']) as $ip) {
            if (trim($ip)) $candidates[] = trim($ip);
        }
    }

    if (!empty($service['customfields'])) {
        foreach ($service['customfields'] as $cf) {
            if (!empty($cf['value'])) $candidates[] = $cf['value'];
        }
    }

    // 找私网 172.16.N.X
    $privateIp = null;
    $N = $X = 0;

    foreach ($candidates as $c) {
        if (preg_match('/^172\.16\.(\d{1,3})\.(\d{1,3})$/', $c, $m)) {
            $N = intval($m[1]);
            $X = intval($m[2]);
            if ($N >= 1 && $N <= 255 && $X >= 10 && $X <= 255) {
                $privateIp = $c;
                break;
            }
        }
    }

    if (!$privateIp) return '';

    // NAT 端口
    $ssh_port   = 19000 + ($X - 10);
    $start_port = 20000 + ($X - 10) * 20;
    $end_port   = $start_port + 19;

    // HTML
    $html = <<<HTML
<style>
.nat-item {
    cursor:pointer;
    font-weight:bold;
    padding:2px 4px;
    border-radius:4px;
}
.nat-ip { color:#1a73e8; }
.nat-port { color:#d93025; }
.copy-tip {
    display:none;
    margin-left:6px;
    color:green;
    font-size:12px;
}
</style>

<script>
function natCopy(val, tipId){
    navigator.clipboard.writeText(val).then(()=>{
        var tip = document.getElementById(tipId);
        tip.style.display = "inline";
        setTimeout(()=>{ tip.style.display="none"; }, 1200);
    });
}
</script>

<div class="panel panel-default" style="margin-top:20px;">
  <div class="panel-heading"><strong>NAT 端口信息</strong></div>
  <div class="panel-body">

    <!-- 公网 IP -->
    <p id="nat-public-ip-row" style="display:none;">
        <strong>公网 IP:</strong>
        <span
            class="nat-item nat-ip"
            id="nat-public-ip"
            onclick="natCopy(this.textContent,'tip-public-ip')"
        ></span>
        <span class="copy-tip" id="tip-public-ip">已复制</span>
    </p>

    <!-- SSH -->
    <p>
        <strong>SSH 端口:</strong>
        <span
            class="nat-item nat-port"
            id="nat-ssh"
            onclick="natCopy(this.textContent,'tip-ssh')"
        >{$ssh_port}</span>
        <span class="copy-tip" id="tip-ssh">已复制</span>
    </p>

    <!-- NAT 范围 -->
    <p>
        <strong>NAT 端口:</strong>
        <span
            class="nat-item nat-ip"
            onclick="natCopy('{$start_port}','tip-range')"
        >{$start_port}</span>
        -
        <span
            class="nat-item nat-ip"
            onclick="natCopy('{$end_port}','tip-range')"
        >{$end_port}</span>
        <span class="copy-tip" id="tip-range">已复制</span>
    </p>

  </div>
</div>

<!-- 解析 NAT 公网 IP -->
<script>
(function(){
    function fill() {
        try {
            document.querySelectorAll(".list-info-title").forEach(function(el){
                var txt = el.textContent.trim();
                var m = txt.match(/NAT公网IP[::]\\s*(\\d{1,3}(?:\\.\\d{1,3}){3})/);
                if (m && m[1]) {
                    document.getElementById("nat-public-ip").textContent = m[1];
                    document.getElementById("nat-public-ip-row").style.display = "block";
                }
            });
        } catch(e){}
    }
    if (document.readyState === "loading") {
        document.addEventListener("DOMContentLoaded", fill);
    } else {
        fill();
    }
})();
</script>
HTML;

    return $html;
});
在产品的配置页增加一个自定义字段如下图,x.x.x.x改为NAT的IP即可,勾选项都不选即可。

这里只测试了Proxmox VE VPS For WHMCS的插件,其他的没测试,实现方法就是从产品详情页面抓取IP计算端口,可自行修改代码尝试。
参考:
https://virt.spiritlhl.net/guide/pve/pve_install.html
https://www.nodeseek.com/post-12946-1
https://openssw.com/view/我要当oneman.md








mark 鸡腿奉上
快进到ONEMAN
鸡腿鸡腿
牛逼 收藏了~~~
请问使用的Proxmox VE VPS For WHMCS插件是什么版本,收费吗